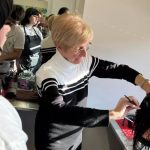
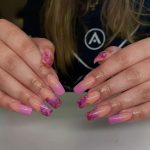
May 17, 2012

Perfecting Your At-Home Manicure

  • Don’t shake your polish bottle. Try rolling it between the palms of your hands instead. Shaking the polish vigorously creates a bazillion little bubbles that you can’t see… until they rise! If you absolutely have to shake the bottle to mix your color, do so and then wait about half an hour so all the bubbles can surface before you start your mani.
  • Avoid thick polish. The thicker the polish, the longer bubbles will take to surface. A new bottle of polish is thinner and the bubbles rise quicker. You can add a couple drops of polish remover to thin out thick polish, but just remember that adding acetone/remover weakens the bond between the polish and your nail. AKA: it will probably start to chip sooner.
  • Keep the lids on your polish. Sometimes we forget to screw the lids down while doingnail art or cleaning up the cuticles. The longer you leave the lid off, the more air gets in and the more the polish will thicken and thick polish is a bubble trap!
  • Use a base coat. I don’t think I’ve ever seen bubbles in a base coat. Have you? Laying a proper foundation for your polish is a must when trying to avoid bubbles.
  • Do your nails in a cool, dry place. If you’re body temp is up, heat will radiate and can actually cause polish bubbles. If temperatures are high where you are, try using a small fan to dry/cool your nails right after polish is applied. Soaking or running your hands in cold water and then drying them before you start painting can also help if it’s hot out.
  • Let the first coat dry completely. I’ve noticed that with some polishes, you have to let the first coat fully dry before applying the second coat to avoid bubbles. If you don’t have time to let the first coat dry entirely, at least make sure you’re using a polish with a “quick dry” label.
  • Lift the brush as little as possible. On your first coat, try doing long strokes instead of short quick strokes with the brush. I find that the quicker shorter strokes will push air into the polish. If you need to do short quick strokes to get to a certain spot, do it on the second round after the first coat dries all the way.

Source: http://thebeautydepartment.com/2012/04/avoiding-nail-polish-bubbles/#more-6269

May 16, 2012

DIY – Boho Braid

We focused on “music festival” hair, and now a similar style the “Boho Braid”.  Taken from Lauren Conrad’s The Beauty Department Blog, is this wonderful simple tutorial.

Tools:

  • 2 Claw clips
  • Bobby Pins
  • Hair tie, preferably matching your hair color
  • Fine tooth comb
  • Hairspray

Steps:

1. Start with wavy hair. If your hair is naturally straight, curl some sections to give it texture.

2. Separate the hair on the left & right sides of your head. Using your part as a guide, continue the part down the middle of the back of your head. To maintain the effortless, imperfect look, use your fingers instead of a comb. Tie one section with a hair tie to keep it out of the way.

3. French braid the free section of hair back to the nape of your neck & secure with bobby pins or a clip. To add more texture, try a Reverse French braid: Alternate crossing the 2 outer sections of hair UNDER the middle section instead of over. To make the look more free-spirited, leave out bangs & short layers around your face.

4. Repeat Step 3 on the other side of your head, clipping the French braid at the nape of your neck.

5. Gather the hair into a low ponytail below the clips & secure with a hair tie. When the ponytail is secure, remove the clips from the braids.

6. Time to add some volume! With your fine tooth comb, tease 1” sections of hair where they come out of the pony tail, keeping the ends less distressed, & secure with a medium hold hair spray.

7. Create more volume & texture in the braids by lightly pulling the loops apart with your fingers.

8. To finish the look, wrap a section of hair from underneath the pony tail around the hair tie. Secure with bobby pins.

 Try it out for yourself, post some pictures on our facebook wall of your work – facebook.com/rizzieriavedaschool

May 15, 2012

Student Life – Transitioning to Clinic

We recently read an article in First Chair about the transitions through cosmetology school. We found some words of wisdom from the manager and lead instructor at Carsten Aveda Institute in New York City, Gloria Hortua.

Since the clinic is all about skill development, focus on quality, not speed. If you mess up the structure of a cut or a color formula, speed of service doesn’t matter, says Hortua, noting that a 2½-hour bob is not unusual for a first clinic attempt when each step is checked by an instructor. Plus, if you’re taking your time, you’ll be able to calm yourself, focus and think of important hair-related questions to ask the client.

Finally, if you are having a problem, never be too shy—or too arrogant—to excuse yourself from your client to get help or call an instructor over. One big difference between the clinic and the salon is no one can fire you—yet. Other tips for transitioning to the clinic:

♥ Continue to practice on mannequins at home.

♥ Don’t work on friends at home if you can get them in the clinic, where you can receive guidance and make the experience pay off for both of you.

♥ Don’t insult people to get them in the clinic. Saying “Your color is mousy” is not going to encourage anyone to let you touch her hair!

♥ Don’t be a slacker on attendance. The old joke is that showing up is half the job, but it’s too true in beauty school. If you don’t have a specific number of hours, you can’t work on the clinic floor.

♥ Use a checklist for at-home review—some students get so flustered, they forget to drape clients or remove the cape when done.

♥ Start developing good habits, like asking clients to pre-book and educating them about styling products.

♥ Take it easy on yourself; now is the time to learn from mistakes.

For more information on this subject, see the following article http://www.firstchair.com/features/advice-for-new-stylists/career-development-advice/Transitions-From-Classroom-To-Clinic-To-Salon-142939175.html

May 14, 2012

Curly Hair Tip

According to Allure Magazine, one of the biggest tips for maintaining your curly hair, is to avoid over shampooing. They even love Aveda Be Curly Shampoo to get the job done!

LAY OFF THE SHAMPOO

Hairstylists agree that when it comes to washing curly hair, less is definitely more. Shampoo as infrequently as possible: every other day if your hair is very fine; once a week if it’s superthick.
On days you don’t wash it, we suggest just rinsing with water. And when you must lather up, use moisturizing products that contain ingredients like shea butter, palm oil, or avocado oil. (We like Aveda Be Curly Shampoo—it contains a blend of aloe and wheat protein that retracts around ringlets as they dry to help fight frizz).

May 11, 2012

Quote of the Week

Filed under: Quote of the Week — Jennifer @ 8:37 am

May 10, 2012

Aveda – DIY Dewy Complexion

Are you looking for the perfect dewy complexion to match your Beachy Waves? We have another great tutorial from Aveda on how to create that look – let us know what you think!

YouTube Preview Image

May 9, 2012

Voorhees Town Center’s Farmers Market Kicks Off This Saturday

Filed under: Why Rizzieri Aveda School — Jennifer @ 8:06 am

May 8, 2012

Aveda – DIY Beachy Waves

Looking for the perfect beachy look, without having to go to the beach all day?  Aveda has a great video tutorial on how to create that look at home.

YouTube Preview Image

So what do you think?? Simple enough to do at home?

May 7, 2012

Sun Care for Your Hair

Did you know?

UV Rays, Salt, and Chlorine DAMAGE HAIR, leaving it dull, dry, and discolored.

Solution: Aveda’s 16 Hour Defense & Recovery System for hair

May 4, 2012

Quote of the Week

Filed under: Quote of the Week — Jennifer @ 8:34 am

Older Posts »
Rizzieri AVEDA Beauty School 8200 Town Center Blvd., Voorhees, NJ 08043 (856) 988-8600 http://rizzierischools.com/